Understanding Vapor Barriers
What is a Vapor Barrier?
A vapor barrier is a material designed to resist the diffusion of moisture through walls, ceilings, and floors. It acts as a shield against water vapor, preventing excessive humidity from penetrating into the living space from the ground or outside air. Typically made of plastic sheeting or specialized coatings, vapor barriers are an essential component in areas prone to moisture, such as crawl spaces, basements, and even walls. Proper installation is critical to ensuring a home’s structural integrity and occupant comfort.
Why Vapor Barrier Installation is Essential
Vapor barrier installation is crucial for several reasons, largely centered around moisture management. Excess moisture can lead to mold growth, wood rot, and structural damage. By preventing moisture from accumulating in crawl spaces and basements, homeowners can safeguard their investment and promote a healthier living environment. Additionally, a well-installed vapor barrier can improve energy efficiency by reducing the load on heating and cooling systems, thus lowering utility bills. If you are considering enhancing your home against moisture threats, exploring options for Vapor Barrier Installation is a smart choice.
Common Myths about Vapor Barriers
Many misconceptions surround vapor barriers, leading to improper installation or maintenance. One common myth is that vapor barriers are only necessary in climates with high humidity. In fact, even areas with a relatively dry climate can experience moisture transmission. Another myth is that using a thicker plastic will always provide more protection; however, using the correct installation techniques is often more crucial than the material thickness. Understanding these myths can lead to more effective and informed decision-making regarding vapor barrier installation.
Preparing for Vapor Barrier Installation
Assessing Your Crawl Space
The first step in preparing for vapor barrier installation is thoroughly assessing your crawl space. Check for existing moisture issues, such as dampness, standing water, or mold growth. Look for sources of moisture from within the house, like leaking pipes or poor drainage outside. Understanding the extent of the problem will help determine the best type of vapor barrier and installation method. It’s also essential to measure the dimensions of your crawl space, including height, width, and any obstacles that may hinder installation.
Selecting the Right Materials
Choosing the right materials for your vapor barrier is crucial. The material should be impermeable to water vapor—common options include polyethylene sheets and reinforced membranes. Aim for a thickness of at least 6 mil for adequate protection. Additionally, consider using a vapor barrier with a UV-resistant coating if it is exposed to sunlight. Research different products and consult with professionals if necessary to ensure you select materials appropriate for your specific conditions.
Gathering Necessary Tools
Before beginning your installation, gather all necessary tools to ensure a smooth process. Essential tools typically include a utility knife for cutting the vapor barrier, measuring tape for accurate dimensions, and a stapler or adhesive for securing the barrier in place. Additionally, have a broom or vacuum on hand to clean the crawl space before installation. If your space is particularly tight, consider a pair of knee pads and a headlamp for safety and ease of movement.
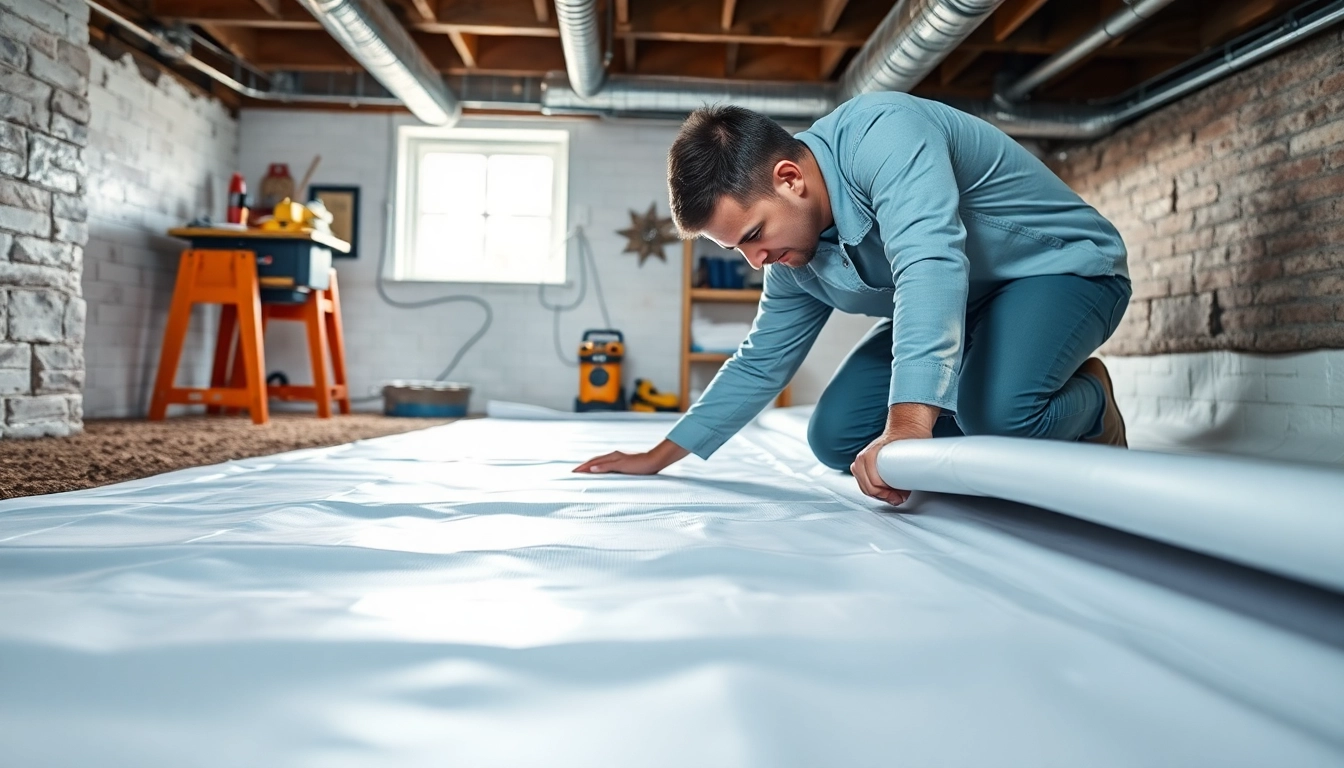
The Process of Vapor Barrier Installation
Step-by-Step Guide
1. Prepare the Crawl Space: Start by cleaning the crawl space thoroughly, removing any debris and old insulation. Inspect for leaks or damage that may require repair.
2. Address Moisture Sources: Before laying the barrier, ensure that all sources of moisture are mitigated—fix leaking pipes, improve drainage, and consider installing a dehumidifier if necessary.
3. Lay the Vapor Barrier: Unroll the vapor barrier across the crawl space floor, overlapping seams by at least 12 inches. Ensure it covers all exposed earth.
4. Secure the Barrier: Using construction adhesive or adhesive tape, secure the edges of the barrier to the walls and any obstructions to create a continuous seal.
5. Install Additional Protection: Consider placing additional protection over the barrier, like a layer of insulation or a drainage mat, depending on local conditions.
6. Final Inspection: After installation, inspect for any wrinkles or gaps and ensure everything is properly sealed to resist moisture infiltration.
Common Challenges and Solutions
While installing a vapor barrier may seem straightforward, several challenges can arise:
- Difficult Access: In tight or low crawl spaces, maneuverability may be limited. Consider enlisting help or using long-handled tools to overcome these challenges.
- Mold or Mildew: If mold is present, it must be removed and treated before installing the vapor barrier. A professional mold remediation service may be necessary for extensive growth.
- Moisture Levels: High humidity levels can impede the effectiveness of the vapor barrier. Monitoring humidity and controlling moisture with proper ventilation and dehumidifiers is crucial.
- Seaming Issues: Improperly sealed seams can lead to potential moisture failure. Use adhesive or tape specifically designed for vapor barriers to create strong seals.
Safety Precautions During Installation
Safety is paramount during installation. Always wear appropriate personal protective equipment (PPE), including gloves and a face mask, particularly if working with mold or dusty environments. Maintain ventilation in the crawl space to reduce inhalation of harmful particles. If using any chemicals or adhesives, be mindful of their fumes and ensure proper ventilation to prevent irritation. Familiarize yourself with the space, especially if it has low ceilings, to avoid injury during installation.
Post-Installation Considerations
Inspecting for Effectiveness
After installation, it’s essential to periodically inspect the vapor barrier for any signs of wear or damage. Check for signs of moisture accumulation, mold growth, or visible tears in the barrier. A good practice is to perform inspections every six months, more frequently during the rainy season. Addressing any small problems early can prevent costly repairs down the line.
Maintenance Tips for Longevity
To ensure the longevity and effectiveness of your vapor barrier, consider the following maintenance tips:
- Regular Inspections: As mentioned, routine inspections help catch any potential issues early. Set a calendar reminder for this task.
- Keep Drains Clear: Ensure that drainage systems are functioning correctly and clear of debris that could lead to water accumulation.
- Monitor Humidity Levels: Use a hygrometer to monitor indoor humidity. Keeping levels between 30-50% can mitigate moisture problems.
- Address Any New Leaks: Immediately remedy any new plumbing leaks and evaluate surrounding structures for water issues.
Signs Your Vapor Barrier Needs Replacement
Even well-installed vapor barriers may require replacement over time. Signs that it’s time to replace your vapor barrier include:
- Visible Tear or Damage: If you notice significant holes or tears, it’s best to replace the barrier to maintain effectiveness.
- Persistent Mold Issues: Recurrent mold problems indicate that moisture is seeping through, necessitating replacement.
- High Indoor Humidity: If indoor humidity levels remain high despite proper functioning HVAC systems, the vapor barrier may no longer be effective.
Frequently Asked Questions
How long does vapor barrier installation take?
The duration for vapor barrier installation typically ranges from a few hours to a full day, depending on the size of the crawl space and the complexity of the installation. Adequate assessment and preparation can expedite the process.
Can I install a vapor barrier myself?
Yes, many homeowners can install a vapor barrier themselves, provided they follow the correct guidelines and safety precautions. However, consulting a professional can ensure proper installation for complex cases.
What are the costs associated with vapor barrier installation?
The costs of vapor barrier installation vary based on materials, crawl space size, and whether a contractor is hired. Homeowners can expect to spend between $0.50 to $3.00 per square foot for materials including installation labor.
How do I maintain my vapor barrier?
Maintaining your vapor barrier involves regular inspections every six months, ensuring drainage systems are clear, and monitoring indoor humidity levels. Address any leaks or signs of moisture promptly to enhance longevity.
What is the best type of vapor barrier material?
The best type of vapor barrier material is typically polyethylene sheeting with a thickness of at least 6 mil. This material effectively prevents moisture diffusion and is generally easy to install in crawl spaces.